A little journal of my adventures in gardening, cooking and other constructive projects.
Showing posts with label plans. Show all posts

Sunday, March 18, 2012

Yard Work and Plans

With the crazy 20-degrees-above-normal weather we've been having recently, the snow and ice have almost disappeared from sight, and I'm having a hard time fighting the urge to start my seedlings a full month earlier than last year!  Ah yes, gardening fever is beginning again...!

This year I'd like to (try to) "keep things real", or at least, manageable.  Last year, my eyes were bigger than my, uh, garden; I had too much going on and not enough time and energy to do it all.  Also, because of the very strange weather (hot and humid--strange for Winnipeg!), we had some strange things happen, like rampant powdery mildew!

I think I've learned (a little) from (some of) last year's difficulties.  One of the things I'm trying to minimise is "garden fatigue".  This is what I'm going to call that mental state that happens to me when I have no set plan for the day, that I'm just going to "do yardwork" or I tell myself I'm going to frolic when I'm actually itching for something to do.  I'll just walk into the garden and start half-assedly doing stuff: pruning, weeding, tying tomato vines to stakes--but without any thought about what I'm actually doing.  While the last thing I ever want to do is turn gardening into a chore, I definitely don't want to go about haphazardly sowing flower seeds into the lawn, thinking how nice it would be to have daisies in the grass, when I paid for those seeds!

So I'm trying to generate more step-by-step plans.

For example:  I've noticed that in the 3x6 bed, which I'll also refer to as the "carrot bed", there is a lot of mulch from last year, and a lot of little rabbit droppings!  While the droppings are probably loaded with nice soil-enriching nutrients, they're probably still active, and I've read carrots don't even like compost unless it's old and absolutely positively done composting.  So both the mulch and droppings have got to go.

By the way, the carrots I left in the ground from last fall?  As far as I can tell, they got pulled up and eaten!  I haven't seen a single carrot seedling, but there are rather fresh-looking holes!  Maybe that idea of rabbits pulling up carrots has some truth!

I've decided to write down step-by-step what I need to do, and in what order, to prepare the bed for carrots this spring.

This list is mostly for my own benefit, but of course, it is free to view by the public:

Since the carrot bed is smaller, and carrots can be direct-sown earlier in the year, preparing the carrot bed takes priority.  Additionally, building the soil sorting device earlier avails them for use in the 3x16 bed.

Step One:  Buy materials for the soil sorting device!  I know this device has to have a name, but I can't seem to remember it (a grader?).  This device is basically a four-sided box with a mesh stapled to the bottom; and it will separate out the finer soil from the larger chunks.  I think this action also has a name (grading?) but I can't remember that either, so I'll refer to it as "sorting" the soil.  I'm thinking the device should be about 12" by 18" and about 6" deep.  The mesh comes from a roll of eavestrough liner I bought last year and barely used.  I'll have to buy some new lumber (2x6-es I presume) though.  I'll need at least two of these, but three or four would be better, as I plan to have another garden work party this year!

Step Two:  Remove the top layer of soil from the bed.  I'll probably use the large pet boxes to store the soil for easy dumping into the sorting device.

Step Three:  Build the sorter/s (as described above).

Step Three and a half:  Prepare cocopeat (see step five below).

Step Four:  Sort the soil.  I'll likely have a helper that day, and the two of us will sit by the carrot bed, dumping the green bins into our sorters and shaking away (over the bed).  The mulch can go into the mulch bin, and the rabbit poops can go into the compost heap.  (If adding cocopeat, remember to wet it down regularly.)

At this point, the important things have been accomplished.  However, this would be an ideal time to...

Step Five:  Add soil amendments.  (Of course, they'd have to be purchased earlier.)  In this case, the amendments would be sand, cocopeat and perhaps some bone meal.  Adding cocopeat takes time, as it needs to be rehydrated and broken apart.  Putting the block of cocopeat into the bed and sprinkling with the hose would before sorting the soil would probably provide enough time for the cocopeat to rehydrate.  When the soil has been sorted, take a hoe to the cocopeat and rake it apart.  If it crumbles easily, add the other materials (so that each pull of the hoe both breaks apart the cocopeat block and mixes in the amendments).

Step Six:  Level the surface and water the soil.  Use the back of a thatching rake to level.  Gently water using the "shower" setting.

At this point, the bed is just about ready for sowing!

Step Seven:  Sow carrots.  This is how I sowed carrots last year, and it really seemed to work, so I'll stick to it this year, too.  (I used this method because the soil was thick and heavy, but with the added sand and cocopeat, the first step may not be necessary!)
  1. Cover the surface of the area in which carrots (or radishes) will grow, with a thin layer (half a centimetre) of cocopeat.  Level.  
  2. Lay the square-foot grid.  This year, I'll be using sisal or jute twine, not the flimsy green plastic stuff from last year.  
  3. Using a thin dowel, divide each squarefoot into sixteen squares by pressing the dowel into the cocopeat.  
  4. In the centre of each little square, make a shallow depression using the end of the dowel.  
  5. Sow one carrot (or radish) seed in each little hole.  
  6. Fill in the holes.  
Step Eight:  Dampen, mulch and water again.  Use the "mist" setting on the hose showerhead to dampen the cocopeat.  Then cover the sown area with leaf mulch (at least 4cm).  Water the mulch gently (use the "shower" setting).

At this point, the carrots are ready to grow, but if last year was any indication, the leaves will need protection!  But carrots are slow to germinate, and the following step can be put off for maybe a week.

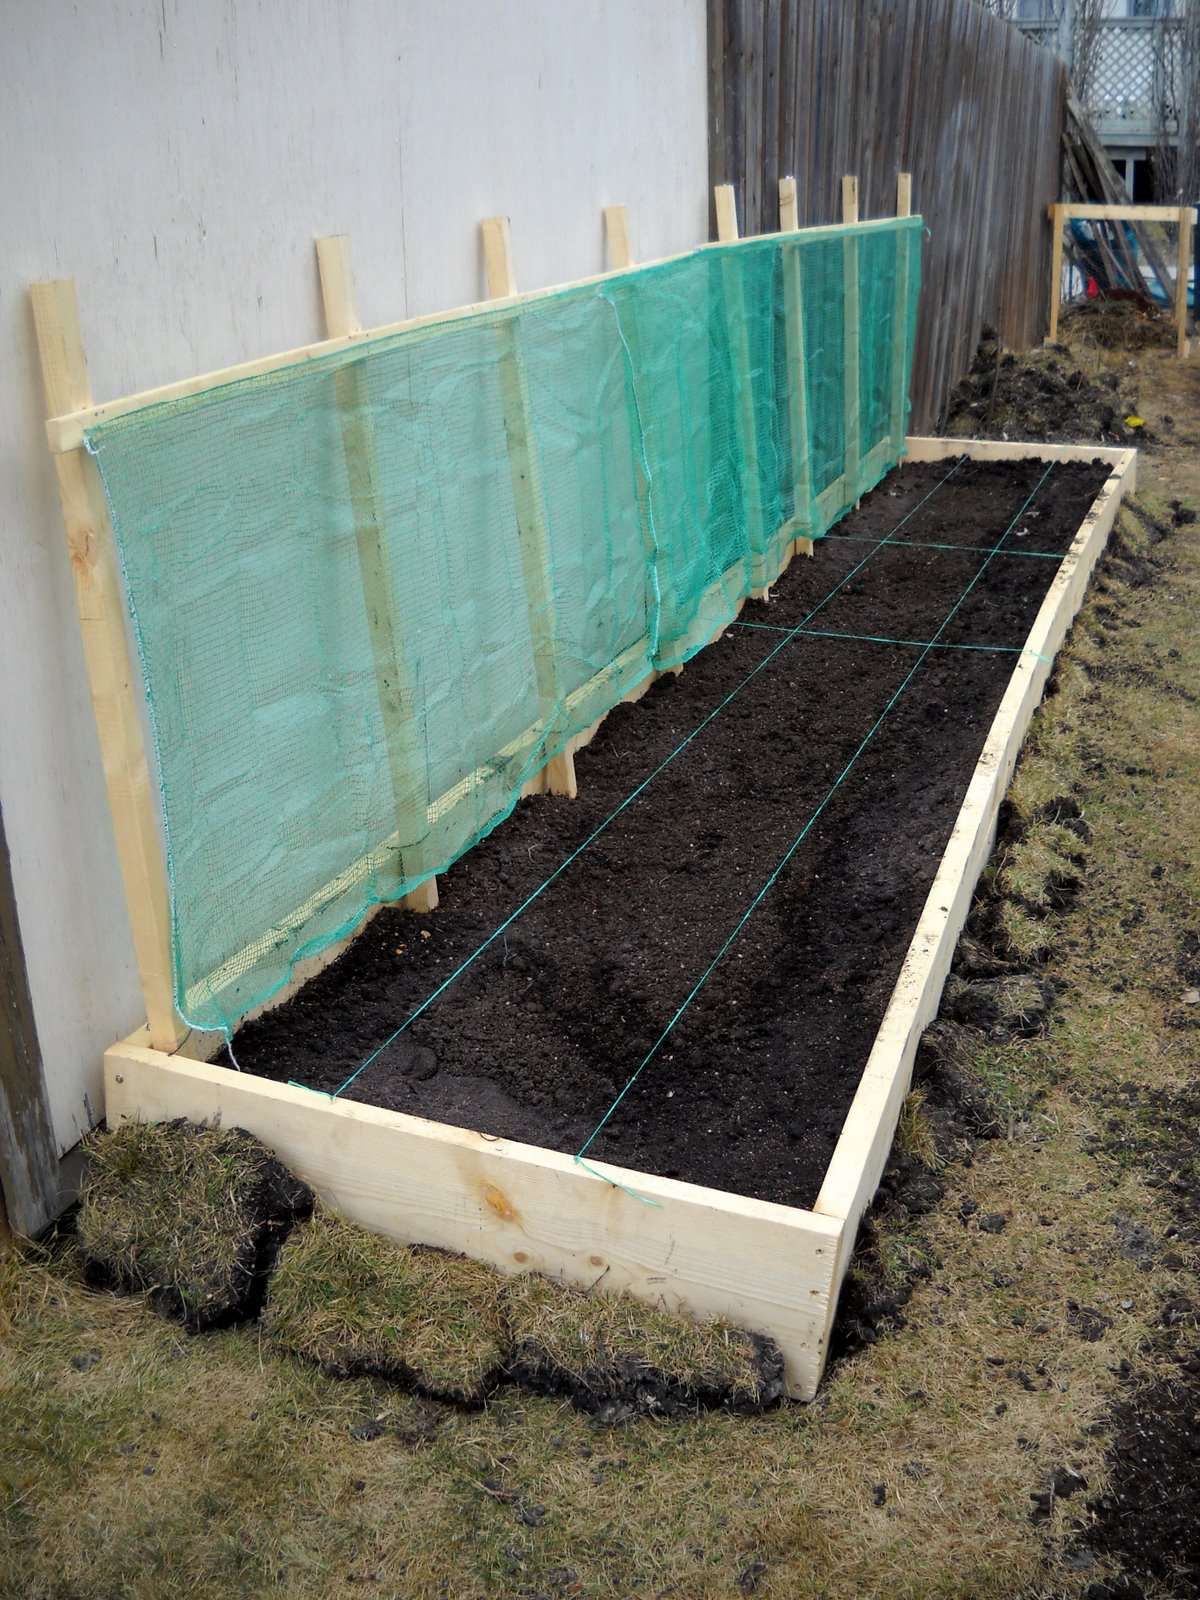
Step Nine:  Lay a net over the bed.  Or better yet, construct an easily removable framework over which a net may be secured.  Since the broccoli eventually grow to be much taller and wider than the carrots and radishes, a removable structure makes more sense right now.  Later, when the broccoli is large enough to be uninteresting to birds, I may only need a fence to keep the rabbits away from the carrots.

Step Ten:  Take a relaxing sit in the hammock.


Tuesday, March 6, 2012

Garden Anticipation

It's getting closer to garden planning time again!  Average date of last frost in Winnipeg, MB is 25 May.  (Fellow Canadians: find yours here!)

Working backwards...  Most of the crops I'd like to plant need about a month to germinate indoors before they're ready to move permanently outside.  Last year, I believe I started my seeds on the last day of exams, or at least after the important ones were over.  I'll have to check again.

Since last year's tomatoes were a huge hit--in particular the Sunsugars--I'll be giving them more garden space this year!  Here are my tentative plans (click to enlarge).

3x16 bed:

That's right, TEN tomato plants.  I may also plant some tall-ish crops with the marigold, maybe celery?  Something that likes the shade of the tomatoes...

Mom has some beans from her friend, and I may plant some behind the zucchini to help fix nitrogen into the soil.  Although last year, the birds kept eating the peas I planted in that spot!

3x6 bed:
I want to be just swimming in carrots by the end of the season.  If I time it correctly, I may be able to have an almost continual supply of carrots until late fall!  (If every seed produces a carrot and I only sow once, I'll have 144 carrots!)

The broccoli is up for debate; but I would need a tall crop to grow at the very back.  Maybe peppers?

I'm also considering building another 3x6 bed.  If I have the resources, here's what I might plant, though I haven't given it too much thought yet.


I'm so excited!  I just can't wait til it's seed starting time!


Monday, April 25, 2011

Not Quite Square Foot Gardening

I started reading All New Square Foot Gardening by Mel Bartholomew.  I liked the idea of "square foot gardening" as an alternative to planting in rows (Mel likes to call it "single row gardening" and calls it outdated every time he can).  I always thought it was silly to leave gaps between rows; and I love the idea of companion planting.

I haven't read it in detail (I read the first 50% pretty quickly and glossed over the rest), and I haven't read the original Square Foot Gardening: A New Way to Garden in Less Space with Less Work; so I don't have much context...  But...  A few observations upon reading:

  1. This guy is very, very, very proud of 'his' square foot garden (then again, if I were to write a book about an idea I felt strongly enough to write a book about, I would probably voice that opinion strongly, perhaps stronger than I actually believe, in order to sell my book and my idea); 
  2. (similar to first point) this book is highly...."branded".  Mel suggests a growing mix that is equal parts peat moss, coarse vermiculite and compost from a variety of sources; and calls it "Mel's Mix".  Not even "Mel's Favourite Mix", or "Mel's Preferred Mix" (though I guess those are wordier?). 
  3. the book is highly opinionated with less fact and data than discourse.  That's not a bad thing to market, but it makes me wonder where ALL THIS RESEARCH HE DID actually happened.  Again, this may have appeared in the first book, and I would have no idea.  

Some ideas I chose to apply to my garden:


Spacing

As above, I like the idea of spacing closely.

Raised Bed

Manitoba Gumbo sucks (literally, when wet, it will suck your boots off).

Note:  I don't know if I agree with the guy who said it's great for your plants.  If you have a layer of clay, and pour water on it, the water will sit on top for a long time, before slowly working its way down.  In the summer heat, it is more likely to evaporate.  And when dry, it cakes and cracks and is hard to rehydrate for the aforementioned reason.

I planned to avoid dealing with Manitoba gumbo by using commercially produced soil.  However, these beds are open-bottomed; so over time, there will be mingling of my soil with the natural soil.

Visible Grid

I like the idea of a visible grid to keep things tidy.  It's hard to visualise exactly what ought to go where near the middle of the bed.

However, in my 3x16 bed, it's just not a good idea to grid by square foot.  I wouldn't want to use up my nails and twine; and some of my plants don't fit into perfect square feet (the way I have them planned).  Maybe next year, though.  Who knows!


Left:  I have divided the bed into three parts.  From nearest to farthest:  Squashes, Cherry Tomatoes, Tomatoes.  Refer to this post for diagrams.

In my 3x6 bed, it is manageable to grid out square feet, so I did.


Right: heap of sod from old garden bed.

Work done today:
  • piled up sod around holes under beds
  • piled up sod around raised beds for more warmth and water-retention
  • put sod into depression near apple tree (not sure if it'll help; but I can fill with leftover topsoil later)
  • watered beds
  • pulled sod apart for laying against beds, and for earthworms
  • distributed some earthworms in beds and compost heap
  • laid grid on both beds
  • turned compost heap
  • added new compostables
  • mixed coir 
  • added coir to compost heap
Left:  compost bin with added materials.  The bright brown stuff is coir.

What's in my Composter

  • last year's lawn scraps (mostly: leaves, grass, pinecones)
  • dried grass from this year
  • pieces of sod (for soil microbes and insects; as well as grass and soil)
  • pine tree scraps (there's like half a bough in there)


Work to be done tomorrow:
  • snip pine bough into smaller pieces
  • snip apple tree prunings into smaller pieces
  • turn compost
  • rake lawn
  • add materials to compost bin (yard scraps, kitchen scraps)
  • buy more coir
  • mix coir
  • If no more pumpkin and zucchini growth, then start new pumpkin and zucchini seeds (tomorrow is 4w until transplanting date).

Saturday, April 16, 2011

Garden Plan

I completely forgot to mention what I'm growing this year:
(Note: McKenzie owns McFayden, Pike, Gusto Italia, Martha Stewart Living, and probably more.)

Vegetables
  • Broccoli
  • Carrots: Nutri Red, Scarlet Nantes and Sweetness (all from McFayden)
  • Leeks: Malabar from Mr. Fothergill's
  • Lettuces: "Misticanza" from Gusto Italia, and "Mesclun - Spicy Mix" from McKenzie
  • Onion: bunching from Mr. Fothergill's and red onions from McKenzie's sets
  • Peas: sugar snap and snow peas (we have several old "leftover" packages of snow peas, I may grow these in pots)
  • Pumpkin: small sugar from McFayden
  • Radish: Cherry Belle (free sample from McKenzie; I may or may not actually plant these)
  • Spinaches: Correnta and Bloomsdale Savoy from Pike
  • Butternut Squash from McFayden
  • Tomatoes: Stupice from McFayden
  • Cherry Tomatoes: Sun sugar from McFayden and Sweet Cherry Hybrid (free sample from McFayden)
  • Zucchini: Sungreen from McFayden

Herbs
  • Basil: Genovese by Gusto Italia and Purple from McFayden
  • Chamomile: Roman
  • Dill
  • Oregano
  • Parsley: Single Hardy Italian (flat leaf)
  • Sage
  • Spearmint
  • Tarragon

Other
These are grown mostly to attract pollinators; some are for companion planting as indicated
  • Aster: Starlight Pink
  • Bachelor's Button: Double
  • Bee Balm: Panorama Mix
  • Black Eyed Susan, a native plant (perennial)
  • Calendula: for medicinal and cosmetic use
  • Cosmos: Early Sensation Mix and Candy Stripe
  • Daisy: shasta, a perennial
  • Flax: blue, as a companion for carrots
  • Gaillardia: Grandiflora, a free sample from McKenzie
  • Marigold: French Mixed by Pike, as a companion, especially to tomatoes, squash and broccoli; an insect repellent; a pesticide (roots produce chemical); a possible rabbit deterrent (I've heard mixed results: some say rabbits don't like the smell; others notice no change)
  • Nasturtium: Jewel Mixed by Garden Corner, as a companion; for consumption
  • Poppy: white cloud
  • Purple Coneflower: a type of Echinacea native to North America; for attracting pollinators; for medicinal (preventative) use
  • Wildflowers - All Purpose Mix by Garden Corner


Garden Bed

I will be using raised beds this year: a 3x16 foot and a 3x6 foot bed (may be expanded to 3x9).

Why three feet wide? With raised beds, it is best to have a width such that everything is within arms' reach. This usually means a width of 4' for an average armspan of 2'. However, my beds will be placed against the neighbour's fence and against the garage (best places for sunlight), so I'll only be able to reach from one side. I figured 2' was too narrow, so decided on 3'.

The 3x16 will be somewhat divided into two general areas: squash and tomatoes. On the left 7' will be: two Zucchini, one Butternut and one Pumpkin. I understand this is not a lot of room for the pumpkin, but I don't require truckloads of pumpkin and butternut, so this should be enough.

Behind them, against the fence, I will have a trellis that runs the entire 16'. Behind the squashes, the trellis will support peas.

Peas and squash grow well together, because squash are heavy nitrogen-eaters, and peas have a symbiotic relationship with nitrogen-fixing bacteria. In fact, the trio of corn, peas and squash have been planted together by some Native tribes who called it the "three sisters".

I will plant a border of dill on the left; and nasturtium and marigold along the bottom, and right. Between the squashes, I will plant oregano; and perhaps spinaches. Spinach will mature before the squash plants get too big, so this is a good use of space.

On the right, cherry tomatoes and regular tomatoes will climb the trellis. Separating cherry tomatoes from regular tomatoes will be a short row of bunching onions. In front of the tomatoes will be a mixed row of parsley, basil and tarragon. And in front of that, my red onions. Border will be comprised of chamomile in the front, nasturtium and marigold to the right and chamomile intercropped with the tomatoes at the rear.

The 3x6 bed will be against the garage.

From the rear forward: broccoli; a row of mixed dill, lettuce and bunching onions; a row of mixed lettuces and spinahces; a row of mixed tarragon, blue flax and chamomile; a row of carrots.

However, because broccoli, carrot, onion and lettuces like cooler temperatures, I'm not sure this is the best place for them. The garage receives a lot of sunlight and the wall is white, so the bed will heat up. I may have to rethink my placement; or perhaps grow a vining plant behind the broccoli... However, during cool spring and fall, this should not pose a problem. I may choose to grow other heat-loving crops in the summer; then switch back to broccoli and carrots in the fall.


In addition to these two raised beds, I will be planting a few containers on the backyard deck; and occasionally moving them onto the lawn for better light.

I intend to have separate pots for: salad greens (mixed lettuces and spinaches); herbs (spearmint must be by itself); butterfly-attracting flowers.

I considered growing a butterfly container that included host plants for butterflies to lay eggs; but that seemed too much hassel for my first year. Next year, perhaps!


Compost
I'm also creating a compost bin! It'll be a very simple 3-sided box with chicken wire walls; just somewhere to pile my yard and kitchen scraps and occasionally rake out to mix.

You can find some basic instructions for a variety of compost bin systems here.